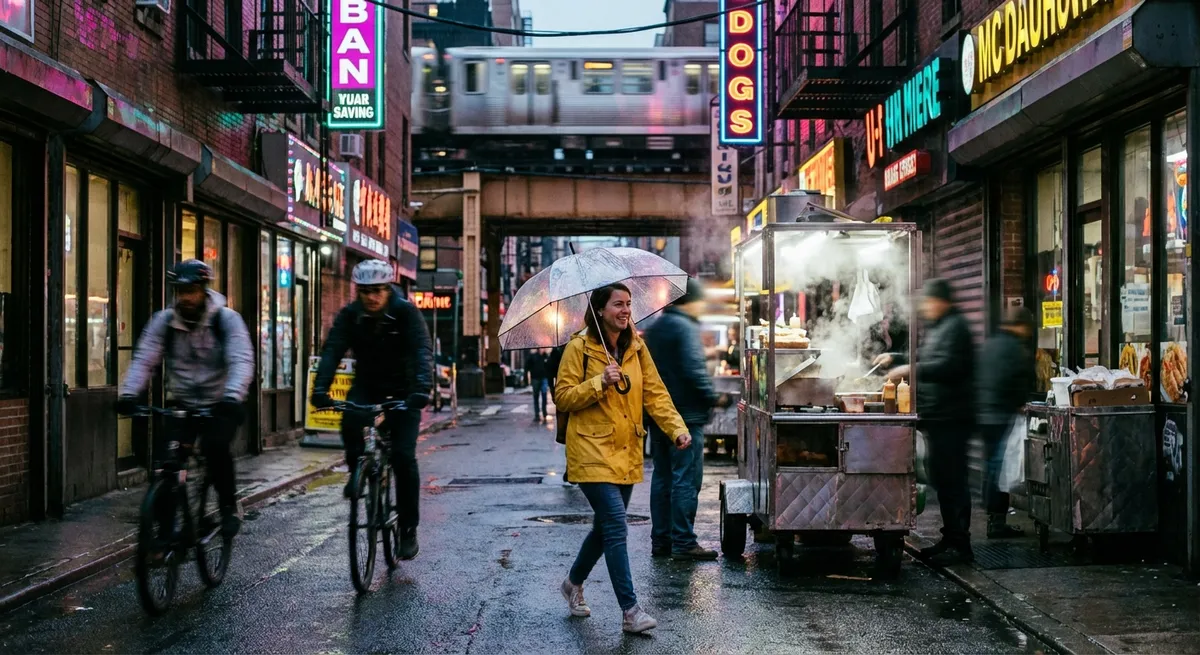
Chasing Moments: A Creative Guide to Street Photography
Street photography is the art of catching life mid-sentence—before it realizes it’s being watched. It’s fast, imperfect, and honest. The sidewalk becomes your studio, strangers become characters, and ordinary scenes suddenly feel cinematic.
This guide is for every kind of shooter: phone photographers, mirrorless obsessives, film romantics. You’ll get concrete camera settings, technique breakdowns, and creative exercises to help you step into the street with more confidence, curiosity, and intention.
---
Seeing the Street: Training Your Photographer’s Eye
Before you touch a dial, train your eyes.
Walk a familiar street without taking a single photo. Instead, notice:
- The way light hits brick at 4 p.m. vs. noon
- Reflections in glass, puddles, and parked cars
- Repeating shapes: windows, crosswalks, bicycles, neon signs
- Micro-theaters: bus stops, café lines, crosswalk pauses
Think in layers: foreground, middle ground, background. Imagine your frame as a stage. Who’s in the front row (silhouettes, signs, railings)? Who’s in the middle (your main subject)? What’s behind them (buildings, billboards, sky)?
**Creative exercise: “The 5-Minute Corner”**
Find a busy corner. Stay in one spot for 5–10 minutes.
- You’re not allowed to move your feet.
- You *are* allowed to change angles by leaning, squatting, or raising your camera.
- Aim to make 10 different photos that feel completely different.
This teaches you that you don’t need a new location—just a new way of seeing.
---
Essential Settings: Simple Street-Friendly Starting Points
Street photography is about reacting fast. That means your settings should serve speed and reliability, not perfection.
Below are baseline setups you can adjust depending on light and style. Think of them as “ready-to-go” modes.
1. Daylight “Always Ready” Setup
**Goal:** Freeze motion, focus quickly, ignore the technical stress.
- **Mode:** Aperture Priority (A/Av) or Shutter Priority (S/Tv)
- **ISO:** Auto, capped at 3200 (or 6400 if your camera handles noise well)
- If using **Aperture Priority**:
- Aperture: f/5.6 – f/8 (good depth of field, enough light)
- Minimum shutter speed (if your camera allows setting this): 1/250s or 1/500s
- If using **Shutter Priority**:
- Shutter: 1/250s to freeze walking; 1/500s if people are moving quickly
- **Focus Mode:** Continuous AF (AF-C / AI-Servo)
- **AF Area:** Wide or Zone with face/eye detect enabled, if available
This setup gives you sharp, usable images in most daylight situations and keeps your mind on composition and timing, not technical details.
2. Low-Light & Night Street Setup
When the sun goes down, your camera has to work harder. Embrace a little noise and a bit of blur—it’s part of the mood.
- **Mode:** Aperture Priority (A/Av)
- **Aperture:** f/1.4 – f/2.8 (use your widest if possible)
- **ISO:** Auto, capped at 6400–12,800 (depending on your camera)
- **Minimum Shutter Speed:** 1/160s for slow walkers; 1/250s if you want more freeze
- **White Balance:** Auto, or set to “Tungsten/Incandescent” for a cooler urban feel
Expect some blur. Instead of fighting it, lean into it: moving cars become streaks; hurried commuters turn into ghosts. Motion blur can *enhance* the sense of city energy.
3. Phone Camera Settings & Tips
If you’re shooting on a phone, you still have creative control.
- Turn on **gridlines** for easier composition.
- Use **burst mode** for decisive moments (people crossing, gestures, eye contact).
- Lock focus and exposure by long-pressing on your main subject (on most phones).
- Avoid heavy digital zoom; move your feet instead.
- In low light, brace against a wall or pole to reduce blur.
Remember: the best camera is the one you’re brave enough to point at a stranger.
---
Technique Deep Dive: Composition, Light, and Timing
Street photography is less about “correct” and more about *intentional*. But a few classic techniques can dramatically improve your shots.
1. Compose Like a Director, Not a Tourist
- **Rule of Thirds:** Place your subject on one of the intersection points of the grid; it adds tension and dynamism compared to dead-center framing.
- **Leading Lines:** Use crosswalks, railings, shadows, and curbs to pull the viewer’s eye toward your subject.
- **Frames Within Frames:** Shoot your subject through doorways, windows, bus stops, arches, and railings. It adds depth and narrative.
- **Clean Backgrounds:** Step a little left or right to remove a distracting pole or bright sign growing out of someone’s head.
**Creative exercise: “One Rule at a Time”**
For a 30-minute walk, choose *one* compositional rule (like leading lines or frames) and commit to it. Everything you shoot must use that rule clearly. This constraint sharpens your eye faster than trying to remember everything at once.
2. Light: The Invisible Co-Author
Light sets mood before composition ever gets a say.
- **Golden Hour (shortly after sunrise & before sunset):** Soft light, long shadows, warm tones; great for poetic, emotional street scenes.
- **Midday Sun:** Harsh but powerful. Look for strong shadows, bold contrast, and graphic shapes. Under awnings and in alleys you’ll find pockets of soft light.
- **Night:** Use available light sources—signs, shop windows, buses, neon. Expose for the highlights (brightest parts) to keep the drama.
Stand still and watch how light moves across a scene. People will walk through that light without realizing they’re stepping into your stage.
3. Timing: The Art of the Almost
Street photography lives in the fraction of a second *before* or *after* something obvious.
- **Anticipate, don’t chase.** If you see a great background (a bold wall, a dramatic shaft of light), frame it and wait for the right person to walk into it.
- **Look for gestures:** A hand brushing hair back, someone laughing, a quick look over the shoulder. Moments with gesture feel more alive.
- **Use burst mode sparingly:** For fast action (cycling, running, kids playing), a quick burst can save a perfect micro-expression.
**Creative exercise: “Wait for the One”**
Choose a visually interesting background. Decide on the *kind* of person you want in the frame (red jacket, umbrella, hat, couple, etc.). Don’t press the shutter until your “character” appears. This drills patience, anticipation, and intentional shooting.
---
Street Etiquette, Safety, and Confidence
Your courage and respect matter more than your gear.
1. Confidence Without Being Confrontational
- Move with purpose. People are calmer when you seem like you know what you’re doing.
- Keep your camera at chest or waist level between shots so you’re not constantly “aiming” at everyone.
- If someone makes eye contact, offer a small nod or smile. Human connection defuses suspicion.
If someone asks you not to photograph them, thank them and respect it. You’ll still have thousands of other moments waiting.
2. Basic Ethics & Legal Awareness
Laws vary by country, but in many places you’re allowed to photograph people in public spaces where there’s no “reasonable expectation of privacy.”
Ethically, ask yourself:
- Does this image respect the person, or exploit them?
- Would I be okay if this photo were of someone I love?
- Am I telling a story about *life*, not ridiculing individuals?
When in doubt: approach, show the image, and ask if they’re comfortable with it. A yes can turn a stranger into a collaborator.
3. Stay Safe and Aware
- Don’t get lost in your viewfinder or phone screen. Periodically look around.
- Avoid confronting situations; no photo is worth genuine risk.
- If a place feels off, trust your instincts and move on.
A calm, alert photographer sees more—and gets home with both photos and peace of mind.
---
Creative Street Exercises to Break Routine
When your work starts to feel stale, constraints can reboot your creativity.
Exercise 1: The One-Lens Challenge
For an entire day, shoot with only one focal length:
- 28mm or 35mm (or your phone’s main lens) is ideal for street.
- Get close; let the environment and subject share the frame.
This forces you to move your body and think about distance and intimacy.
Exercise 2: Color Hunt
Pick a color (red, yellow, or blue works well). For an hour:
- Only photograph that color.
- Look for it in clothing, signs, reflections, vehicles, graffiti.
Later, arrange those images as a mini-series. You’ll start to see how color alone can unify a story.
Exercise 3: Silhouettes & Shadows Only
Shoot for 30–60 minutes focusing *only* on:
- Dark figures against bright backgrounds
- Long shadows stretching across the frame
- High-contrast scenes (doorways, alleys, underpasses)
Use a slightly underexposed setting to deepen your blacks and emphasize shape over detail. You’ll learn to see the world as pure geometry and tone.
Exercise 4: The Silent Story
Make a sequence of 5–10 images that together tell a tiny story:
- Setup (wide shot of the environment)
- Character (closer shot of a person)
- Detail (hands, shoes, coffee cup, ticket)
- Tension or contrast (something unexpected)
- Resolution (a leaving, a pause, an empty chair)
You’re not just “collecting cool shots”; you’re building a narrative.
---
Conclusion
Street photography is a conversation with the world that never truly ends. Every walk, every corner, every stray beam of light is an invitation: *Are you paying attention?*
You don’t need the perfect camera, the perfect city, or the perfect conditions. You need curiosity, respect, and the willingness to press the shutter even when you’re a little nervous.
Set your camera up so it’s ready. Step outside. Watch the light. Wait for the gesture. Trust that everyday life, in all its awkward, unposed beauty, is more than enough.
The street is already telling stories. Your job is to listen—and then show us what you heard.
---
Sources
- [Magnum Photos – A Guide to Street Photography](https://www.magnumphotos.com/theory-and-practice/a-guide-to-street-photography/) – Insights and practical tips from legendary street photographers and Magnum members
- [National Geographic – How to Take Great Street Photography](https://www.nationalgeographic.com/travel/article/how-to-take-great-street-photography) – Covers fundamental techniques, ethics, and visual storytelling on the street
- [Leica Camera Blog – Street Photography: Tips from the Masters](https://leica-camera.blog/2016/03/21/street-photography-tips-from-the-masters/) – Advice on mindset, composition, and timing from well-known street photographers
- [B&H Explora – Street Photography: Tips, Tricks & Gear](https://www.bhphotovideo.com/explora/photography/tips-and-solutions/street-photography-tips-tricks-gear) – Detailed breakdown of recommended settings, lenses, and practical field techniques
- [NYU Journalism – Legal Handbook: Photography in Public](https://guides.nyu.edu/c.php?g=276834&p=1846151) – Overview of legal considerations for photographing people in public spaces (US-focused but conceptually useful)